

This guide will cover how to transfer funds in QuickBooks Online. We’ll show you how to record the transfer and then review or edit the transfer of funds in the bank account check register. You may need to transfer funds frequently between bank accounts in QuickBooks to track bounced checks, avoid overdraft issues, and maintain an accurate account balance.
How To Transfer Funds in QuickBooks Online
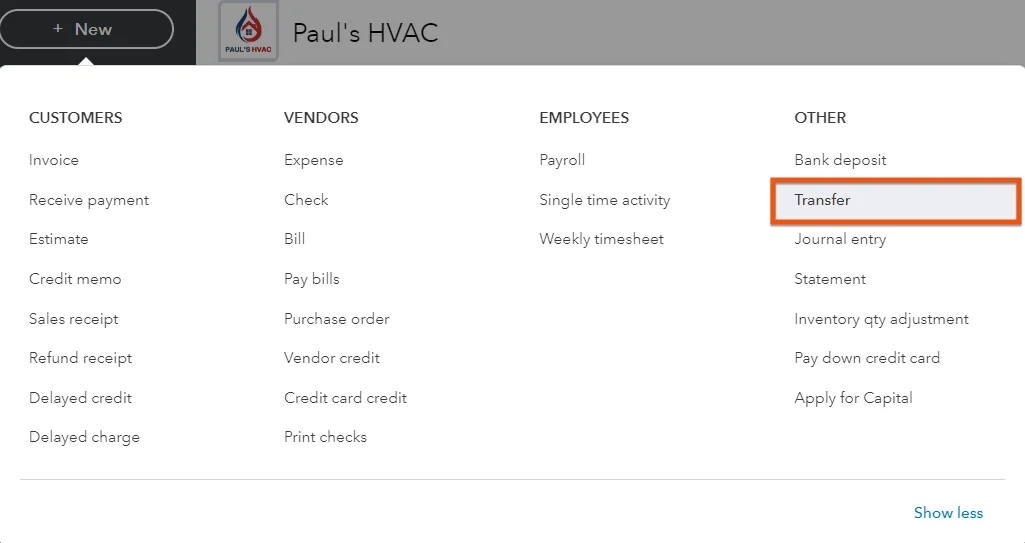
Click on the + New button at the top of the left menu bar of your QuickBooks Online dashboard and then select Transfer under the Other column, as shown below.
Record an account transfer in QuickBooks Online
On the transfer screen, choose the account you want to transfer funds from and the account you want to transfer funds to. Then, complete the other important fields.
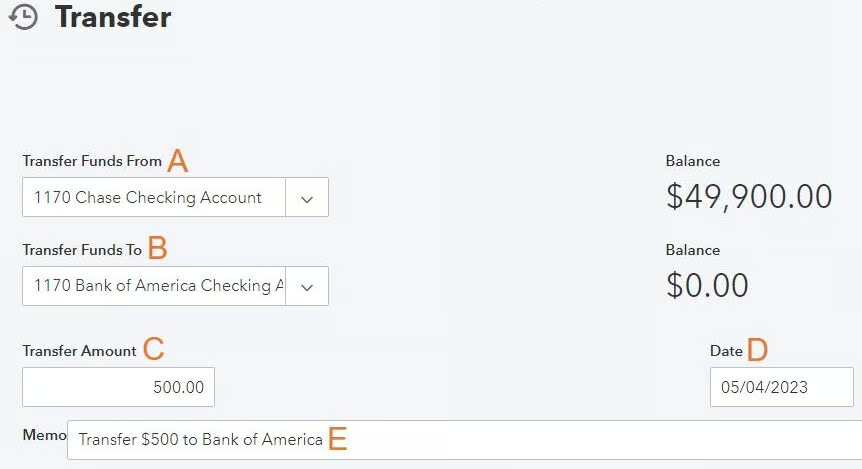
To better illustrate how to complete the transfer screen, let’s use a sample scenario. Let’s say you have two checking accounts, one with Chase and another with Bank of America. You wish to transfer $500 from your Chase account to your Bank of America account.
The screenshot below shows how the transfer screen is completed for our sample scenario.
Fund transfer screen in QuickBooks Online
A. Transfer funds from: Select the bank account from which the funds will be withdrawn. The balance in the account selected will be shown to the right of the account. Make sure you have enough funds in the account to cover the transfer.
B. Transfer funds to: Select the bank account where the funds will be deposited. If this is a new bank account, select Add New to create a new account, as shown in our tutorial on how to set up a chart of accounts in QuickBooks Online.
C. Transfer amount: Enter the amount of the transfer.
D. Date: Enter the date the transfer will be recorded by the bank.
E. Memo (optional): Provide a brief description of the transfer.
After completing all the required fields, click the Save and new button below the screen.
How To Review & Edit Bank Transfers
To review and edit a bank transfer previously entered, you must first find the transfer in your checking account register.
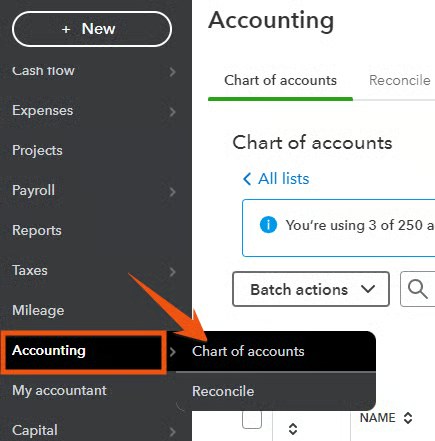
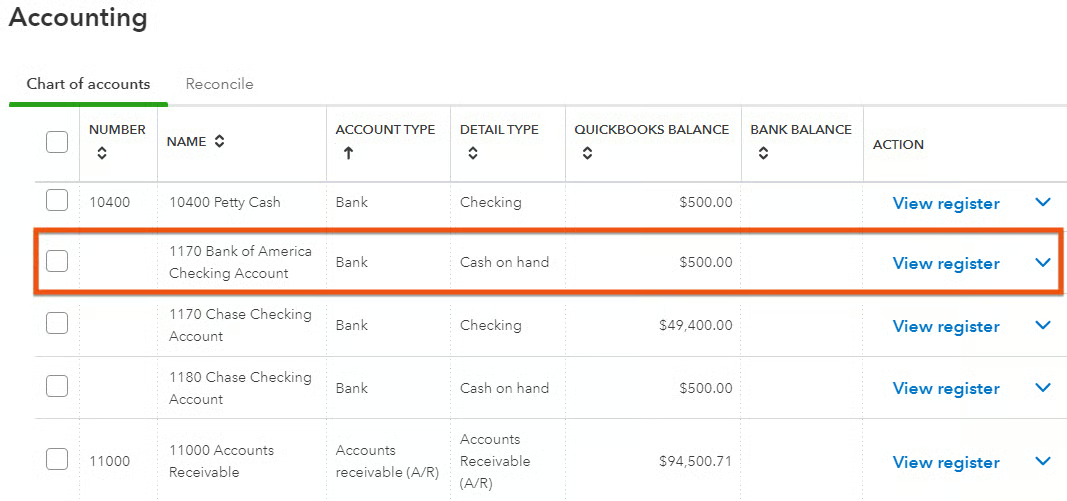
To find the checking account register, hover over Accounting in the left menu bar and then click Chart of accounts.
Navigate to Chart of Accounts in QuickBooks Online
Seeing a different left-side navigation menu?
1. Check User View
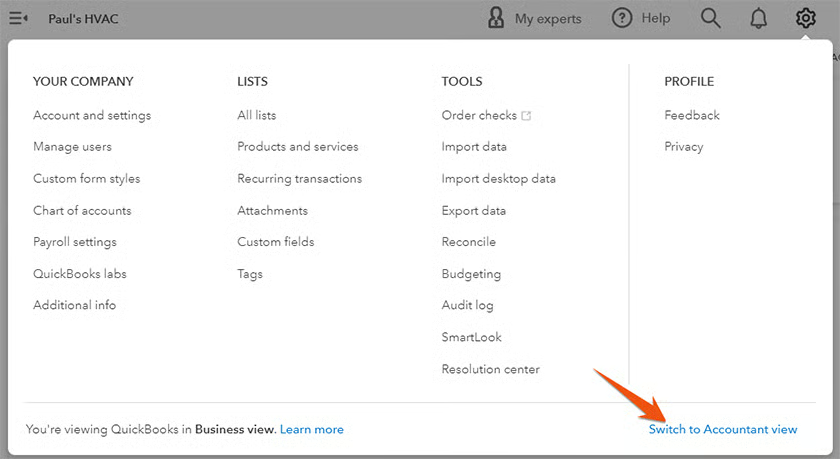
QuickBooks has two user views: Business View and Accountant View. Your left-side navigation menu may look different depending on the user view you are in.
If your sidebar menu is not what is shown in our tutorial, it means that you are on Business View. We prefer and recommend using the Accountant View because it shows a full range of business accounting features and tools that you can use in QuickBooks.
To verify whether you’re using the Business View, click on the cogwheel at the top right-hand corner of your QuickBooks dashboard, and check whether the button on the lower right hand says Switch to Accountant view, as shown below. If so, then it means you are on Business View.
Verify whether you are using Business view or Accountant view in QuickBooks
2. Switch to Accountant view
Once you verify that you are on Business view, click on Switch to Accountant view to update the appearance of your sidebar menu. In a few seconds, you should see the same left-side menu bar illustrated in this tutorial.
Switching from Business view to Accountant view in QuickBooks
In the Chart of Accounts, find the bank account where funds were deposited or the account from which the funds were withdrawn. In the screenshot below, we highlighted the Bank of America checking account—the account where our funds were deposited to. Click on View Register to open the transfer details.
View the check register in QuickBooks Online
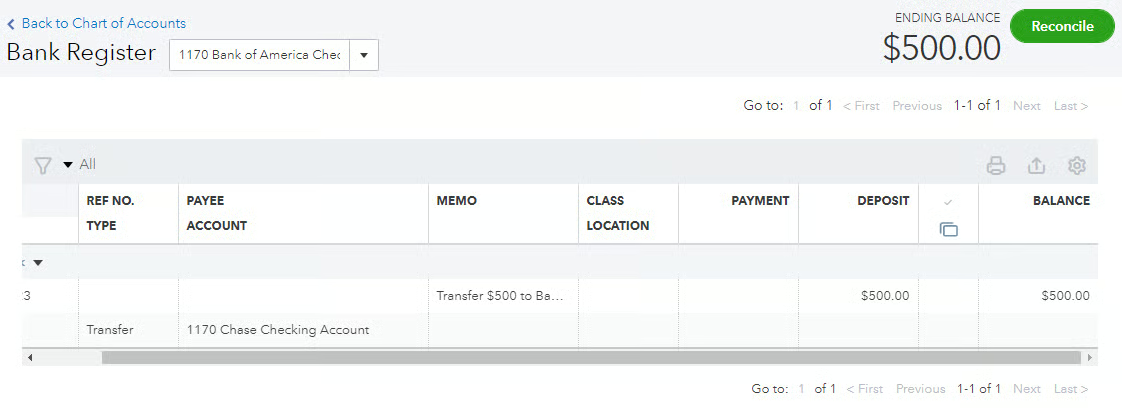
Review the transfer details to verify that the fund has been successfully recorded. Based on the transfer details below, we have successfully transferred $500 to our Bank of America checking account.
Transfer details in the checking register
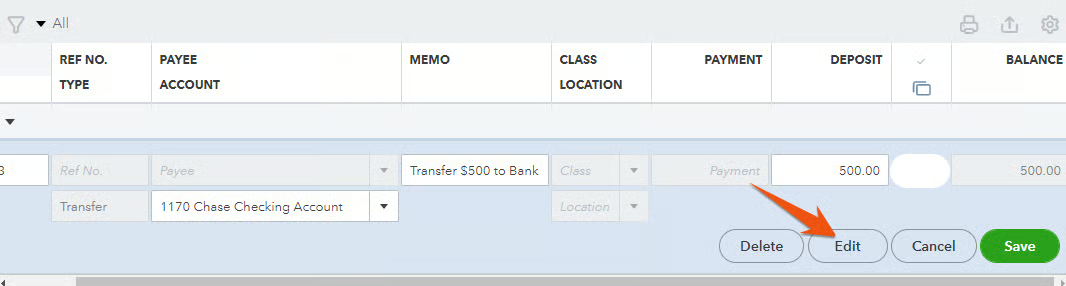
If you need to make changes to the transfer, click anywhere on the grayed transaction entry line and then click on the Edit button. QuickBooks will take you to the transfer screen where you entered the transfer originally. Make any necessary adjustments and then click Save & new.
Click Edit on the transfer details screen
Why It’s Important to Transfer Funds Between Bank Accounts in QuickBooks Online
One reason why QuickBooks Online is awarded our overall best small business accounting software is because of its excellent fund transfer feature that helps you easily move money between your accounts with just a few clicks. We recommend that you use this feature, especially if you have multiple bank accounts. For instance, you might have one checking account for payroll and another checking account for other activities.
It’s important that you understand how to transfer funds in QuickBooks Online to ensure that you have an accurate account balance. If you fail to record a transfer, it may result in an incorrect balance for one or both of the accounts involved in the transfer. This can make it difficult to reconcile your bank statements and could also lead to overdrafts and even bounced checks.
Frequently Asked Questions (FAQs)
Yes, QuickBooks Online lets you easily transfer funds between bank accounts with just a few clicks.
Yes, you can add notes in the memo field to track the purpose of your transfer.
Yes, it can. We have a detailed tutorial on how to process bank reconciliations in QuickBooks Online.
Wrap Up
Congratulations on completing our tutorial on how to transfer funds between bank accounts in QuickBooks Online. The next guide in our training course is how to record a bounced check in QuickBooks Online. That lesson will teach you how to reverse the deposit of a customer’s bad check, restore the accounts receivable from the customer, and record any associated bank fee.