


I’ll walk you through how to set up the products and services list in QuickBooks Online, from selecting which type of item to create—whether it’s an inventory, non-inventory, service, or bundle—and completing the necessary details for each item type. I’ll also guide you on how to import your products and services list, which can be a convenient option if you manage many items.
- Step 1: Prepare the Necessary Information
- Step 2: Navigate to the Products and Services List
- Step 3: Select Item Type
- Step 4: Create the Item
- How to Import Product and Service Items
- How to Run a Products and Services List Report
- How to Modify a Product or Service on the List
- How to Delete a Product or Service from the List
- Frequently Asked Questions (FAQs)
- Wrap Up
Step 1: Prepare the Necessary Information
First, I need to gather the necessary information for my products and services. I’ll gather as much information as possible so that I can quickly set up my items later.
I need to include all products I buy and/or sell, even if I don’t need to keep track of exact quantities, such as nuts and bolts. I have to be as detailed as possible. For example, instead of having one item for “sinks,” I have separate items for each model of sink I buy or sell.
I collect the following information on my products:
- Name of product
- Description of product to print on sales forms
- Description of product to print on purchasing forms
- Stock keeping unit (SKU) number (optional)
- Price at which I wish to sell the product
- Current price at which I can buy the product
- Preferred vendor for purchasing the product
- Whether the sale of the product is subject to sales tax
- If I wish to keep track of the quantity of this item, I need:
- Initial quantity on hand prior to starting to use QuickBooks
- Quantity at which I wish to reorder the product
I’ll need the following information for all services that I sell:
- Name of service
- Description of the service to print on sales forms
- Sales price or rate I wish to charge customers
- Whether the sale of this service is subject to sales tax
- If I purchase the service from a subcontractor:
- Description of service to print on purchase forms
- Cost charged to me by the subcontractor
- Name of preferred subcontractor
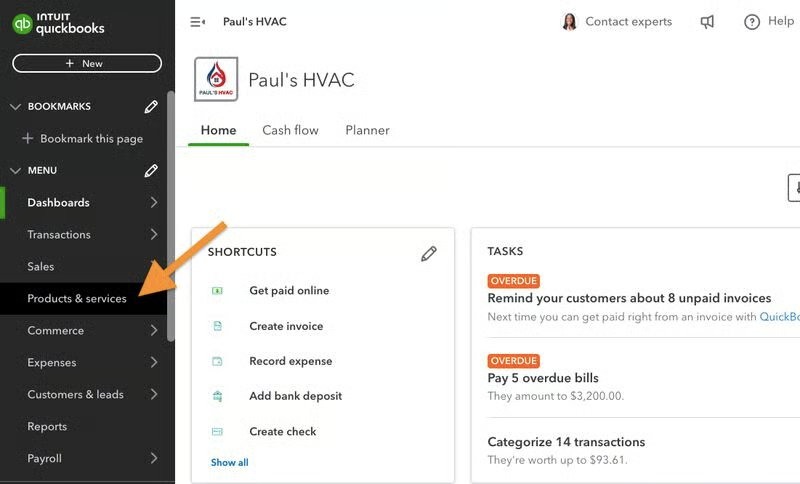
Step 2: Navigate to the Products and Services List
From my QuickBooks Online dashboard, I clicked on Products & services in the left menu bar, as shown below.
Step 3: Select Item Type
Next, I clicked on New in the upper right corner of the Products and Services screen.
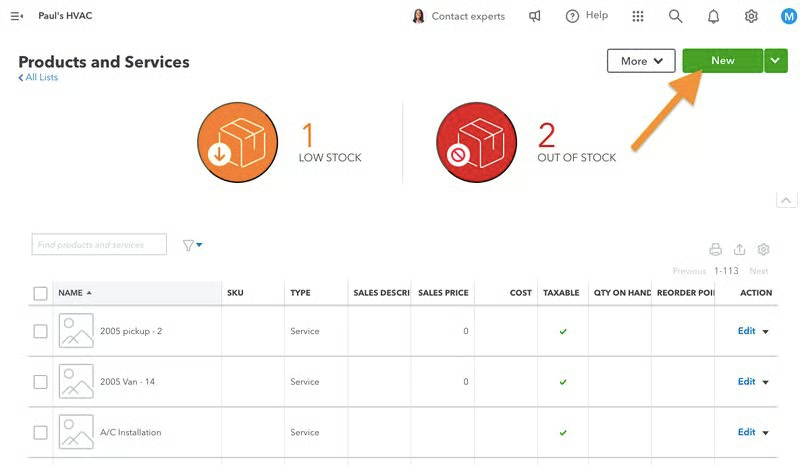
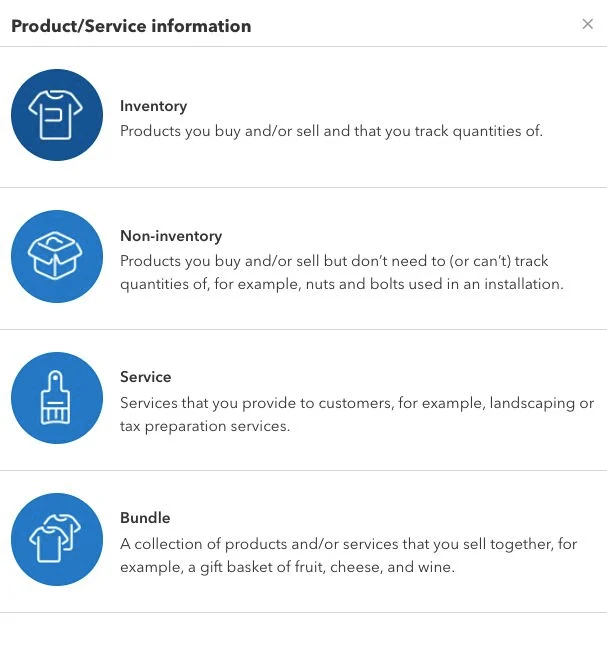
QuickBooks asked me to choose which type of item I need to create. There are four types of items to select from:
- Inventory: Choose this for products you buy and sell and track quantities on hand for.
- Non-inventory: Select this if you’re setting up a product you buy and sell but don’t need to track quantities for.
- Service: This is for the services you provide, like installation, repair, and maintenance.
- Bundle: Set up a bundle for a group or set of products or services sold together as a package.
Step 4: Create the Item
After selecting the item type, I proceed to create the item. I’ll show you how to complete the Product/Service information screen for the different item types. Later, I’ll discuss how to import multiple items from your spreadsheet, which is an easier and quicker method, especially if you have multiple products and services to add to QuickBooks.
At the top section of the inventory creation form, provide crucial details, including:
- Name: Give the item a name for internal use that will help distinguish this item from others.
- Picture of item: Upload a picture of the item.
- SKU: Assign the product a unique identifier, which can be a combination of letters and numbers.
- Sub-product: Organize inventory items into groups of similar products. For instance, I might create a parent inventory item for “Sinks.” Each different type of sink would then be a separate inventory item and designated as a Sub-product of Sinks. I wouldn’t use the parent inventory item of Sinks for any purchase or sales transactions, and it wouldn’t have any quantity information. It would only be used to group the Sub-product items together.
- Class: Separate business activity into several classes that allow you to evaluate profit and loss separately. For instance, an HVAC company might create classes for new installation and repairs. Leave the Class field blank if the inventory item you’re setting up might be sold in multiple classes. In that case, you’ll need to identify the Class separately on each invoice. If the inventory is used only in one Class of the business, you can designate that class here, and it will auto-populate on invoices.
- Initial quantity on-hand: Report the number of units on hand for this inventory item. Only report units here where the purchase of the inventory won’t be recorded in QuickBooks, such as if you’re moving to QuickBooks from another bookkeeping software. This is a required entry, so if you don’t have any units on hand, enter zero. You’re also required to enter the date you measured the units on hand.
- Reorder point: Specify the number of units on hand that should trigger the ordering of additional inventory. This will help you easily identify when to replenish stock.

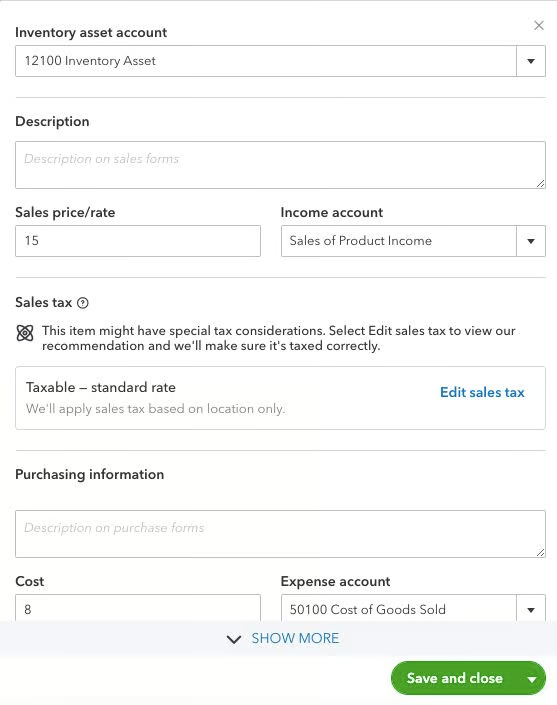
Then, scroll down the form to provide additional details, including:
- Inventory asset account: Specify the balance sheet account you would like to use to track the cost of this inventory item. Most businesses use only one inventory asset account. I recommend using “Inventory Asset” for all your inventory items, which is the default balance sheet inventory account created by QuickBooks Online.
- Description (sales forms): Enter a default description of the product that you would like to appear on sales forms, such as estimates and invoices.
- Sales price/rate: Indicate the standard sales price for this product. If needed, you can change the sales price when creating an invoice.
- Income account: Specify the income statement account to record the revenue from this inventory item. I recommend that all inventory items use the “Sales of Product Income” account, which is the QuickBooks default. There’s no need to create additional income statement accounts for each product because you can print reports that show income by product item.
- Sales tax category: Indicate whether sales of this product are subject to sales tax.
- Purchasing information: Enter a description of the product that should appear on purchasing forms, like purchase orders.
- Cost: Input the standard purchase price per unit for this product. You can change the purchase price when you input bills or purchase orders.
- Expense account: This is the income statement account to report the expense from the purchase of this product. I recommend all inventory items use the QuickBooks default account, “Cost of Goods Sold.”
- Preferred vendor: Specify a preferred vendor for purchasing this product. This will auto-populate any purchase orders for this product but can be changed if the purchase order is to a different vendor.
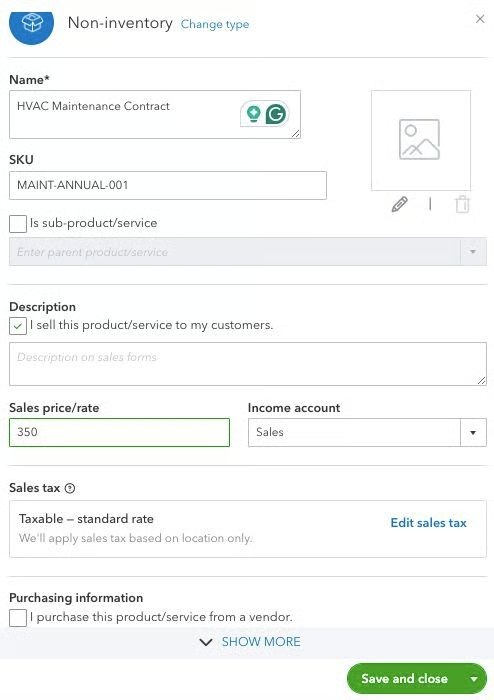
The information requested for creating a non-inventory item is the same as for inventory items (discussed in the previous section), with the following exceptions:
- Non-inventory items don’t require any quantity information
- They aren’t assigned an inventory asset account
- They are assigned to a variety of expense accounts, not only the cost of goods sold (COGS)
- While products sold to customers should go to the COGS account, other products, like office supplies, should be assigned to other expense accounts
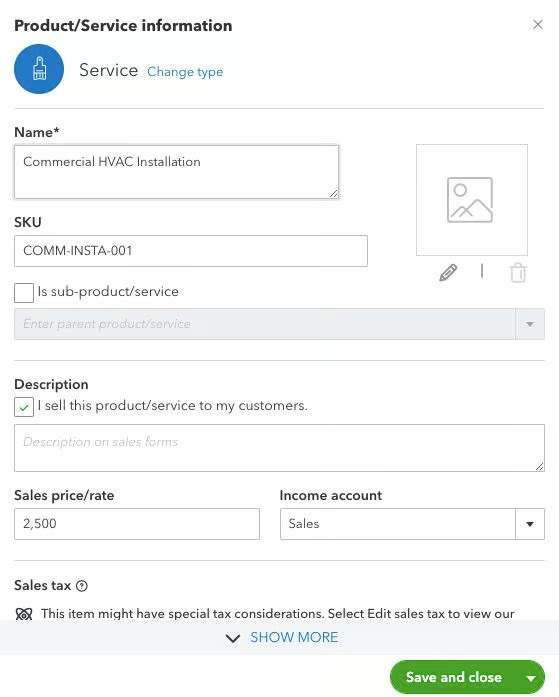
The fields that should be completed for a service item are described below:
- Name: Here, enter the name of the service for internal use.
- Picture: Attach a picture related to the service item, if you wish.
- Subservice: As with inventory items, you can create sub-services grouped under a parent service. If this is a sub-service, select the parent service.
- Class: If your company separates income and expense by class, designate the class for this service item. Leave the field blank if this service can be assigned to multiple classes.
- Description: Enter a description of the service that you would like to appear on sales forms, such as invoices.
- Rate: Input the rate you charge customers for this service. This can be either an hourly rate or a flat rate charged per engagement. The actual amount charged can always be changed on an invoice.
- Income account: Select the income statement account that you want to use to track income for this service. Creating an income account for each service is unnecessary since you can easily view income by service items.
- Sales tax category: Indicate whether this service is subject to sales tax.
- Purchasing information: Leave this area blank if employees perform the services. If you purchase the services from a subcontractor, check the box and provide a description, cost, expense account, and preferred vendor.
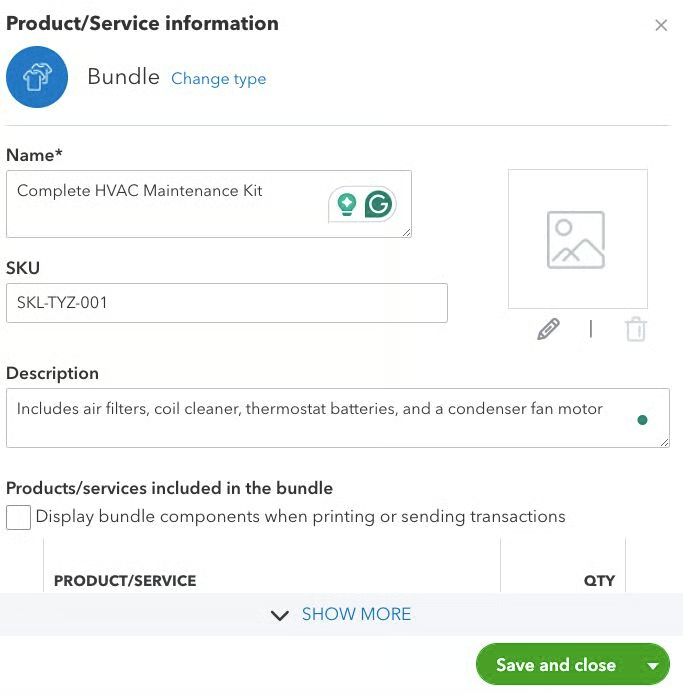
Before setting up a bundle, you must create all the inventory, non-inventory, and service items that will be part of the bundle. To create a bundle, enter the following information:
- Name: Provide a name for the bundle of products and services for internal use.
- Description: Add a description of the bundle to appear on invoices to customers.
- Display components: Check the box if you wish to display the details of the products and services composing the bundle on invoices to customers.
- Product/Service: Choose the product and service items, along with their quantity, to include in the bundle. All product and service items must be created prior to assigning them to a bundle.
Once you input all the requested information, don’t forget to click Save and close.
How to Import Product and Service Items
It was much quicker for me to enter product and service details into a spreadsheet than to use the data input screens in QuickBooks Online. I recommend doing the first few items manually, as shown above, to become familiar with the requested fields. However, if you have many items, it’ll be much faster to enter the data in an Excel or Google spreadsheet and import the file.
I can either prepare a spreadsheet in Excel or Google Sheets. My spreadsheet has one row for each product or service item I wish to import. Each column represents a field, such as product/service name and sales description, to be imported into QuickBooks Online.
The first row of my spreadsheet contains labels for each column, but the labels don’t have to match the field names from QuickBooks Online. I can map each column to a particular field in QuickBooks during the import process.
Below are some of the fields that can be imported for products and services:
- Product/Service name
- Sales description
- SKU
- Type (Inventory, Non-inventory, or Service)
- Sales price/rate
- Taxable (Yes/No)
- Income account (must be set up in chart of accounts prior to import)
- Purchase description
- Purchase cost
- Expense account (must be set up in chart of accounts prior to import)
- Quantity on hand (inventory items only)
- Reorder point (inventory items only)
- Inventory asset account (inventory items only and must be set up in chart of accounts prior to import)
- Quantity as-of date: (inventory items only)
I only need to include columns for which I want to import information. It’s fine for some columns to be missing. Below is what my spreadsheet looks like:

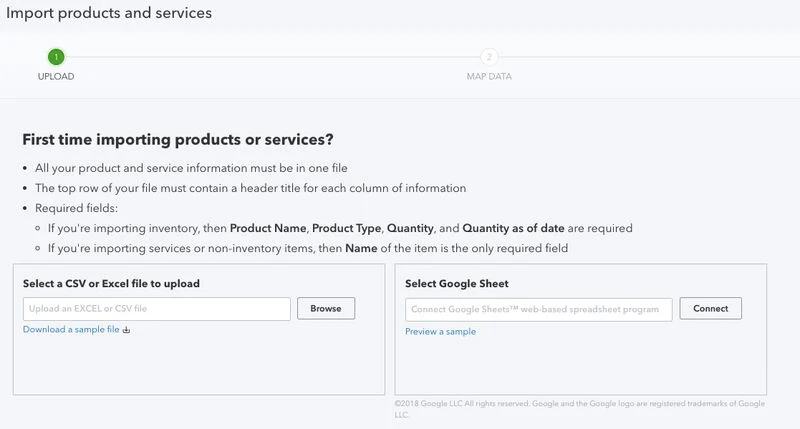
From the Products and Services screen, I clicked on the drop-down arrow next to New in the upper right corner, then selected Import.

From the import screen, I clicked Browse and selected the file I wished to import. I can upload a CSV or Excel file or connect or import a file from Google Sheets.
After selecting the file, I clicked on the green Next button in the bottom right corner of the screen (not shown).
This screen allowed me to decide which of my columns would be imported to each field collected by QuickBooks Online.
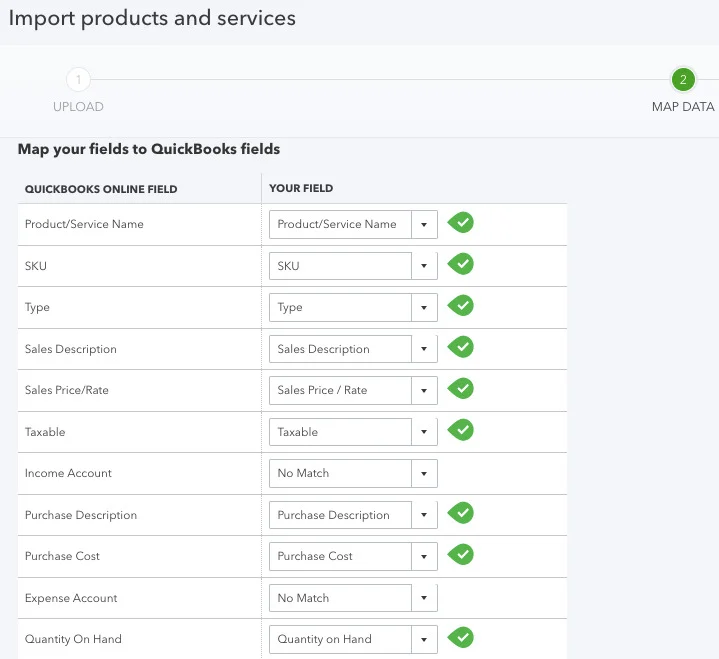
In the left column are the fields available for import into QuickBooks. The right column tells QuickBooks which column in your spreadsheet holds the information for that field. If one of the QuickBooks fields on the left isn’t in my spreadsheet, I indicate “No Match”—as done for the Income Account in the example above.
I’ve mapped all of my columns to QuickBooks fields, so I clicked the green Next button in the bottom right corner of the screen.
The final screen enabled me to review the data that will be imported into QuickBooks Online. I was able to make any last-minute changes directly on this screen. The number of products and services to be imported should equal the number of rows in the spreadsheet minus one for my header row.
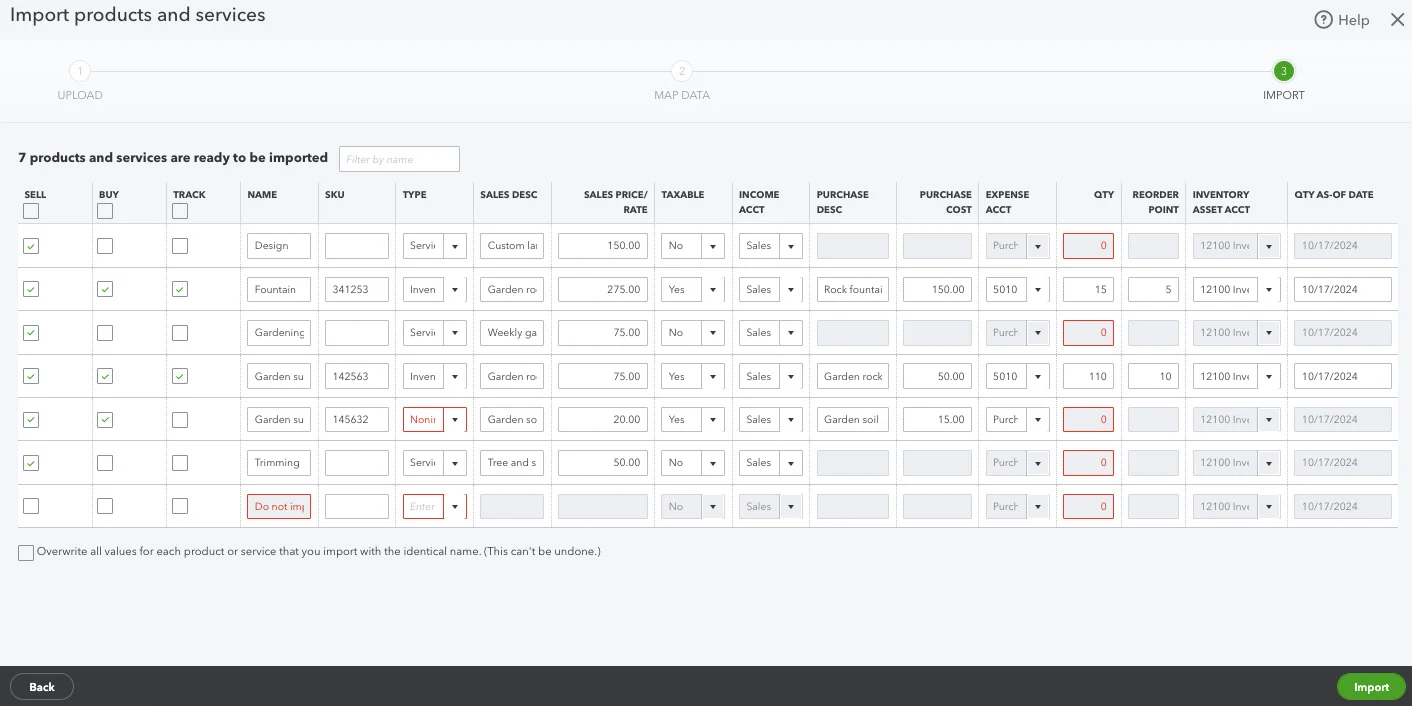
After having reviewed the information, I clicked the green Import button in the bottom-right corner of the screen to complete the import. I received a message that the import was successful, and the new items appeared on my Products and Services screen.
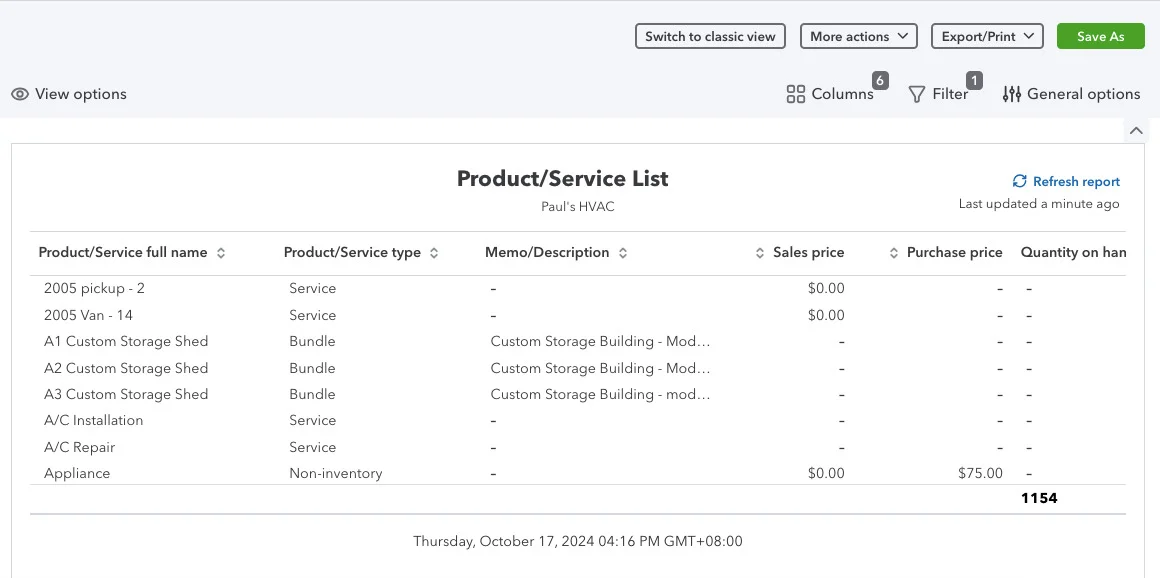
How to Run a Products and Services List Report
Once I have added all my products and services, I can run a report to see the entire list. From QuickBooks Online’s Products and Services screen, I selected the drop-down menu next to More in the upper-right corner and then clicked on Run Report, as shown below.
A report similar to the one below should be displayed and must be reviewed for accuracy.
How to Modify a Product or Service on the List
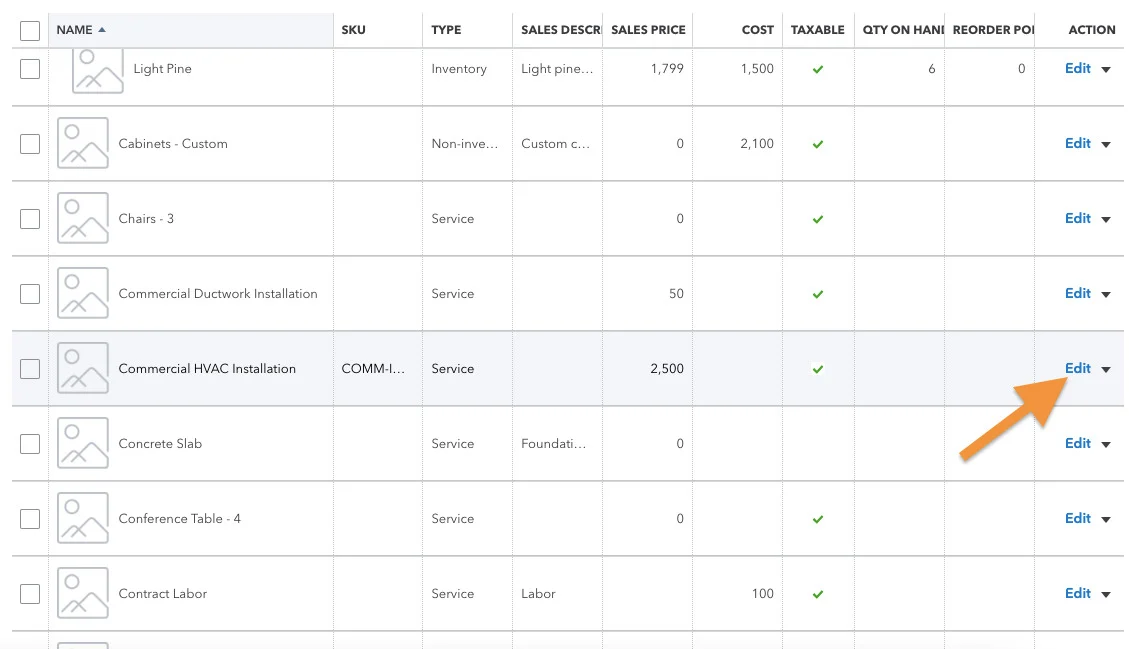
You can modify a product or service that you previously set up. Locate the product or service you want to edit on the Product and Services screen. Click the Edit option on the far right side of the item’s information and make any necessary changes.
How to Delete a Product or Service from the List
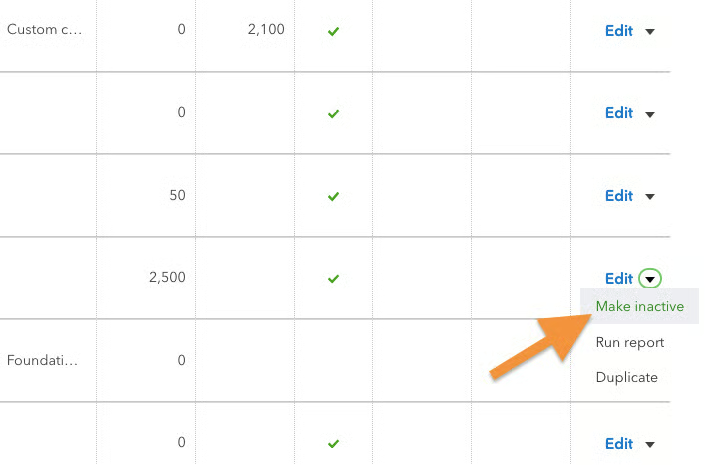
You cannot delete a product or service from QuickBooks once you have used it in a transaction, like having created an invoice for a customer. However, you can inactivate an item that you no longer need. Inactive items will no longer appear on the products and services list but will still appear in financial reports if used in a transaction.
To inactivate an item, click the drop-down arrow next to the Edit option and select Make Inactive. This item will no longer appear on the products and services list.
Frequently Asked Questions (FAQs)
What is a product or service list in QuickBooks?
It’s a list of products and/or services that you sell to your customers.
How do I set up a product or service list in QuickBooks?
You can manually set up a product or service list by adding items using the Product/Service information screen. Alternatively, you can import your product or service items, which is easier and quicker if you have multiple products and services to add.
Can I edit and delete QuickBooks Online products and services?
Yes, you can. You can edit or make a product or service item inactive from the product or service entry on the Sales tab.
Wrap Up
You now know how to set up the products and services list in QuickBooks Online. My next tutorial in our QuickBooks Online Training Course is how to set up customers in QuickBooks Online. In that lesson, I’ll guide you on how to set up contact and payment information for your customers.
← Previous TutorialFree QuickBooks Online TutorialsNext Tutorial →