


This tutorial presents how to run an accounts receivable (A/R) aging report in QuickBooks Online. You’ll learn how to create a basic A/R aging report and modify it using both basic and custom settings. We’ll also present a sample A/R aging report that you can use as a guide when generating your own report.
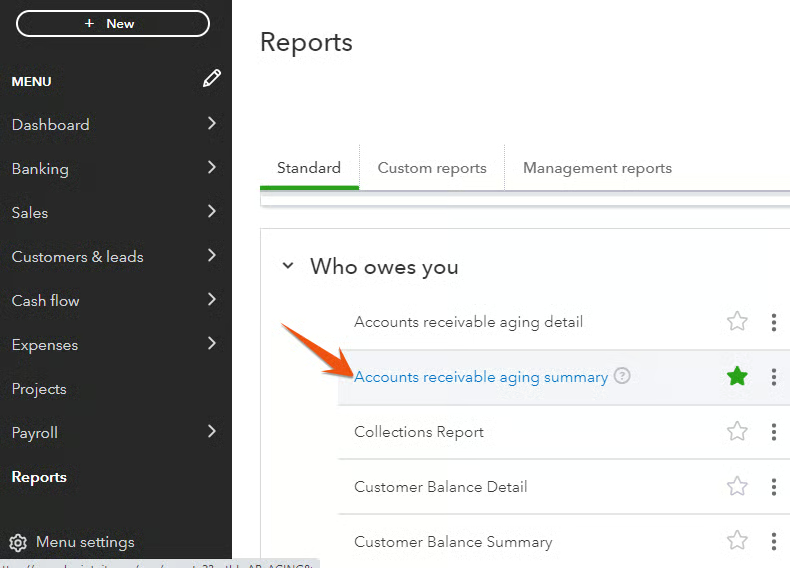
Select Reports in the left menu bar and scroll down to the Who owes you section. Then, select Accounts receivable aging summary from the report options.
Locate the menu bar above the A/R aging summary report by scrolling up the screen. The menu bar provides some general options that can be adjusted.
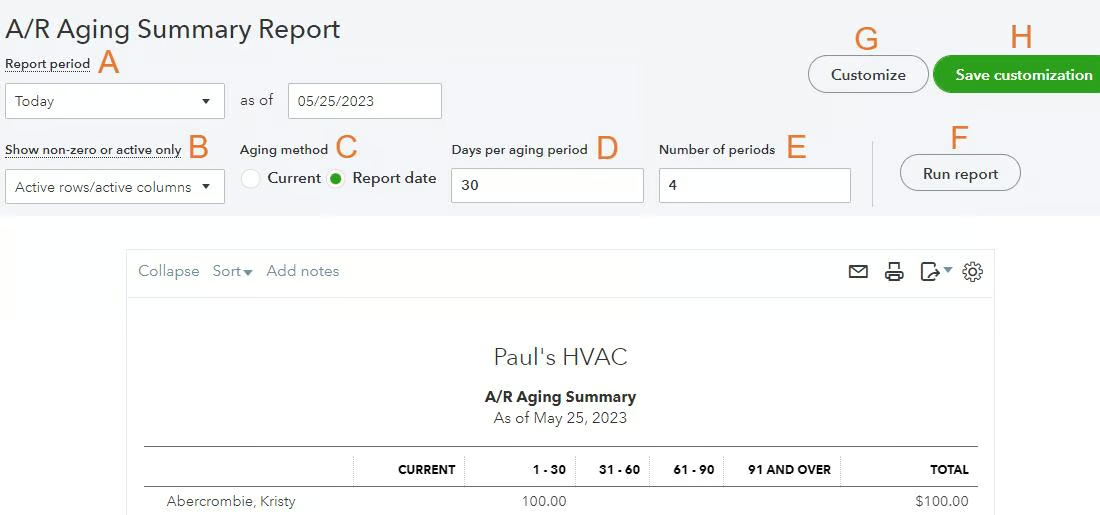
Provide the following details to complete the basic A/R aging summary report:
- Report period: Indicate the period for the outstanding invoices you want to be covered in your report. You can choose common reporting periods from the drop-down menu or enter a custom date.
- Show nonzero or active only: Select whether the report will include all rows or columns (All), only those with data (Active), or those with nonzero totals (Non-zero).
- Aging method: The age of an accounts receivable can be calculated based on either the report date chosen in item A or the date the report is created.
- Days per aging period: Aging reports are commonly based on intervals of 30 days per column, but you can adjust that to a different number of days.
- Number of periods: Set the number of periods, or columns, you would like to display in your aging report.
- Run report: Select this option to apply your changes.
- Customize: Hit this button to customize your A/R aging report even further (although we discuss this in detail in the next section, Step 3).
- Save Customization: Click this button if you want to save the options you have selected. You can apply the same settings when you run your next A/R report.
Don’t forget to click Run report (item F) to record the changes.
You can select additional options for your A/R aging report by clicking the Customize button (item G in the prior section).
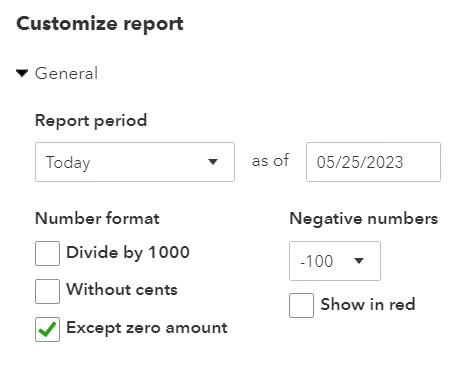
General
In the first section, you can customize general settings, such as the reporting period and number format.
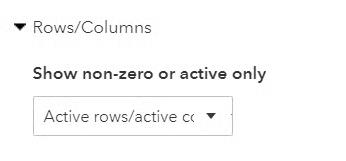
Rows/Columns
Select which rows or columns will be displayed in your report and exclude nonzero and no-activity accounts if needed.
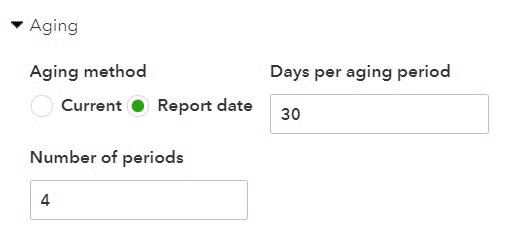
Aging
This Aging section is more useful than the Aging method offered in Step 2 as it allows you to select not only the aging method but also the days covered in each period and the number of periods to run.
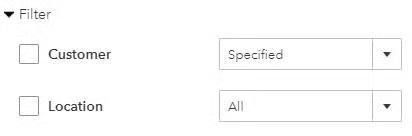
Filter
This customization allows you to filter the aging report based on customer and location. The Customer filter lets you focus on analyzing the outstanding invoices, payment history, and aging of receivables for a specific customer. Meanwhile, the Location filter is particularly useful if your business operates in multiple locations or has different branches.
If you don’t have the option to filter your A/R aging report by location, you can read Step 4 in our guide on how to set up advanced settings in QuickBooks Online.
Header/Footer
Here, you can choose which information to display in the header and footer of the A/R aging report.
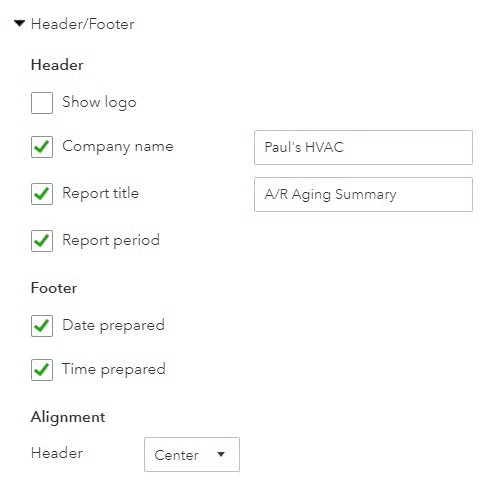
You can change the name of the company and the report that will appear in the header. If you uploaded a logo while creating your company, as discussed in our guide on how to set up your company information in QuickBooks Online, you can opt to display it at the top of your A/R aging report.
Once you’re done customizing your report, click the green Run report button.
You can print, email, or export your A/R aging report via the icons in the top right corner of the screen.
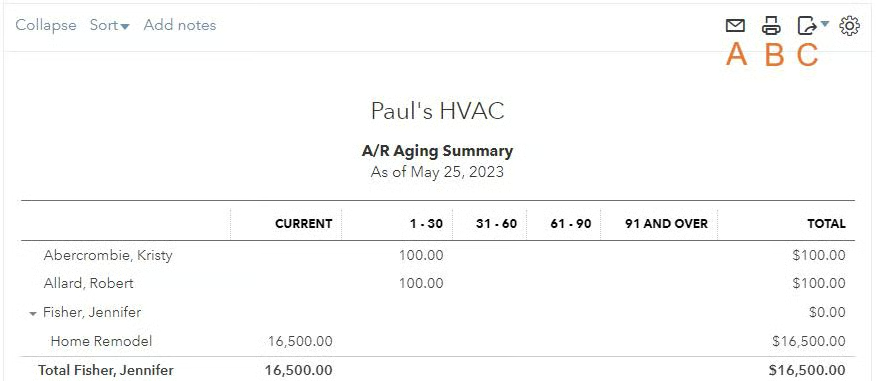
You can click the:
- Envelope icon (item A) to email a copy of your A/R report without having to leave QuickBooks Online.
- Printer icon (item B) to print a copy of your report.
- Drop-down arrow next to the export icon (item C) to choose between exporting your aging report as a PDF or an Excel file. This option also includes an option to add the A/R aging report to management reports. This means that business owners, managers, and stakeholders can easily access and view these essential reports without having to search through the standard report categories.
Take a look at this sample QuickBooks A/R aging summary report.

What Is the A/R Aging Report & Why It Is Important
The A/R aging report lists the amounts owed to you by customers, separated into columns based on the number of days the invoice is overdue. This allows you to identify potential collection problems to address quickly. The report organizes customer balances into aging buckets, like “Current,” “1–30 days,” “31–60 days,” and “61 to 90 days.”
Since the A/R report includes past due invoices, it gives you a better idea of how much money you’re likely to collect next month—rather than looking only at total receivables. Also, it helps you identify trends, patterns, and potential issues with customer payments, which lets you effectively set credit limits and improve collection strategies.
Frequently Asked Questions (FAQs)
Can I customize the QuickBooks aging report?
Yes, you can. QuickBooks Online is highly regarded for its excellent reporting feature—one reason why it’s our overall best small business accounting software. It allows you to customize A/R aging reports by adjusting report settings, such as the date range and customer filters.
How can the information in the A/R aging report help businesses?
The information in the A/R aging report can provide you with meaningful insights that can help you prioritize and improve your collection efforts for overdue accounts.
Wrap Up
You can now run an A/R aging report on the platform. Our next tutorial is how to run an accounts payable aging report in QuickBooks Online. It covers the basic setup and customizing options—just like what you did in the previous tutorials on creating balance sheets, cash flow statements, and profit and loss (P&L) statements.