


This tutorial will show you how to enter credit card transactions in QuickBooks Online, which is an option if you can’t connect your credit card account or if some transactions fail to sync automatically. To do this, you must complete the expense form by providing important details—such as the payee name, transaction amount, payment method, and the appropriate expense category. I’ll also cover how to review your credit card transactions in the credit card register and how to modify transactions if needed.
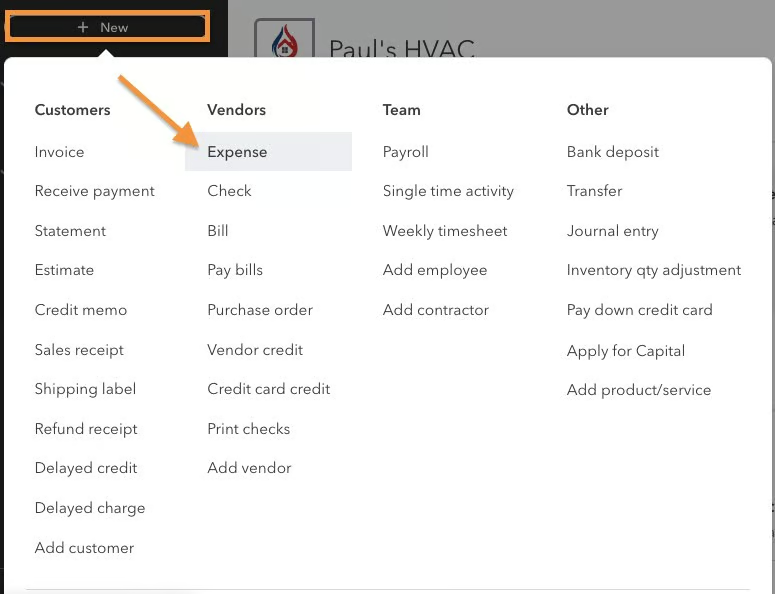
Step 1: Navigate to the Expense Screen
Click on + New at the top of the left menu bar and then select Expense under the Vendors column, as shown below.
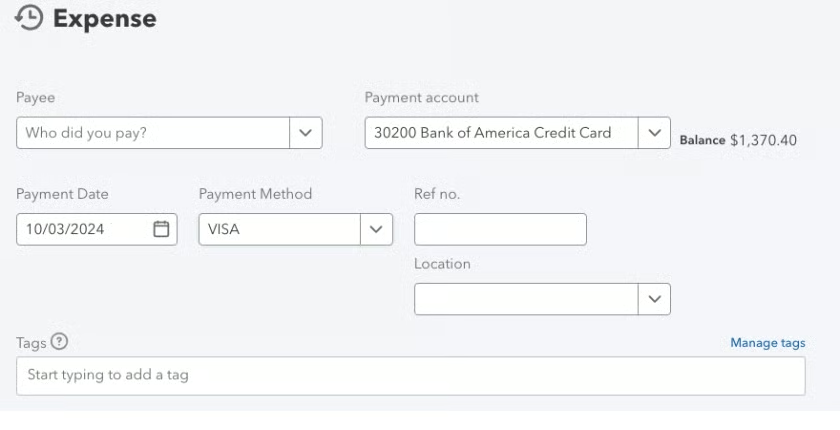
Step 2: Enter Payment Information
In the upper section of the expense entry form, you need to provide the following payment details:
- Payee: Choose the vendor you’re paying or select Add new from the drop-down menu to set up new vendors in QuickBooks Online.
- Payment account: Select the credit card account where the expense was charged.
- Payment date: Enter the date you’re making the credit card charge.
- Payment method: Choose your credit card type (e.g., Visa).
- Ref no. (Optional): Enter a unique number to track the transaction.
- Location (Optional): Specify the physical location or branch related to the transaction.
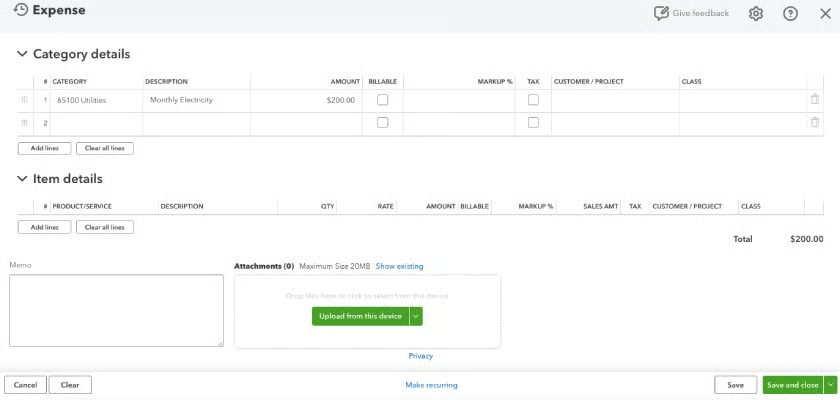
Step 3: Categorize the Expense & Enter Other Details
Scroll down the expense form to complete the remaining sections:
- Category details: This is where you can select the appropriate category for the expense (e.g., Office Supplies and Utilities) and enter other important information, including description, amount, and tax if applicable. Additionally, you can assign the expense to a specific project or customer for detailed cost tracking.
- Item details: For regular business expenses, like bills or utilities, completing the Item detail section is unnecessary. However, if you want to break down the expense into more detail, you can assign the expense to a specific product or service. This is particularly useful for tracking inventory, project costing, and billing clients for specific items purchased.
- Attachments: At the very bottom of the expense form, you’ll find the Attachments section, where you can upload receipts or any other documents related to the transaction.
Step 4: Save the Transaction
When you’re finished entering the transaction details, click on the green Save and close button in the bottom right corner of the screen. If you have other transactions to enter, click the small dropdown arrow next to Save and close and then select Save and new.
How to Review & Modify Credit Card Transactions
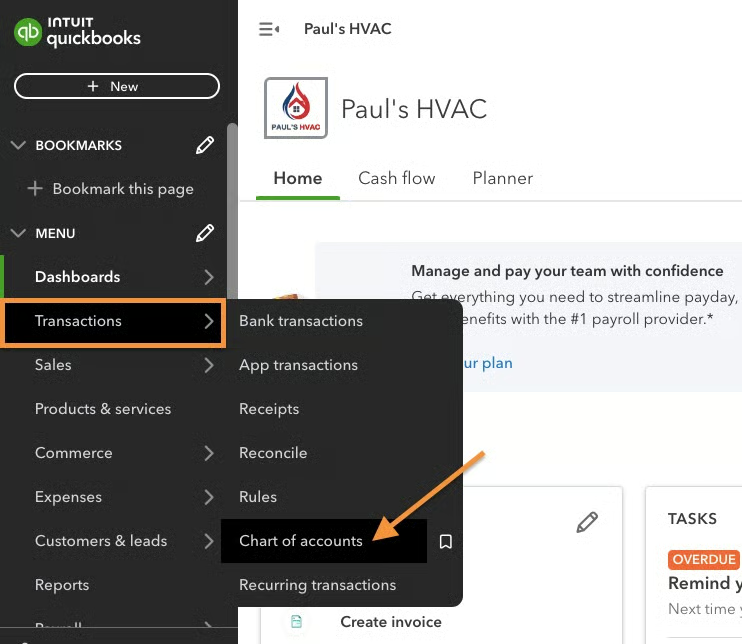
Step 1: Navigate to the Credit Card Register
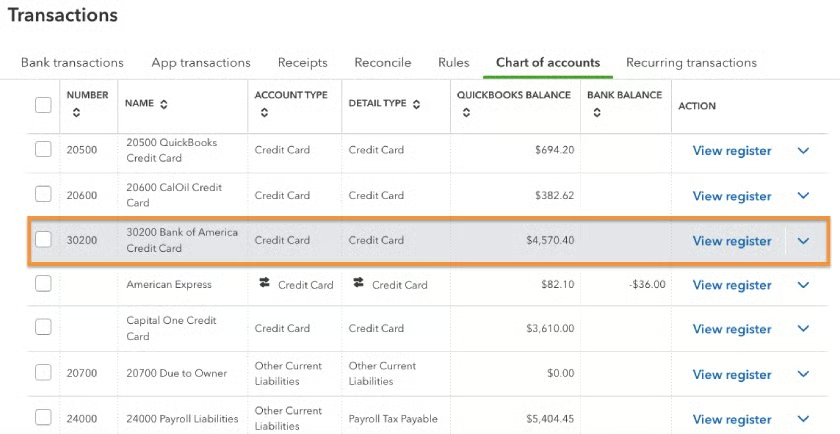
On the left menu bar, hover over Transactions, then select Chart of accounts, as shown below.
Step 2: Locate Your Credit Card Account
In the chart of accounts, scroll down to find your credit card account and then click View register in the far right column. In the screenshot below, I highlighted the Bank of America credit card that was used in recording the expense transaction earlier.
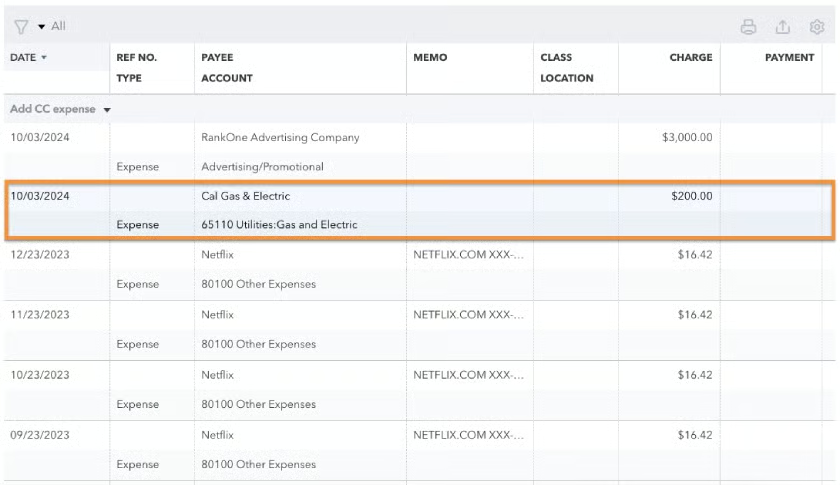
Step 3: Find the Transaction
The credit card register will provide a list of all transactions in your credit card account. Locate the transaction you wish to modify, then click anywhere on the transaction entry line. Again, to help you easily follow this tutorial, I highlighted the transaction we recorded earlier.
Step 4: Modify the Transaction
Once you click on the transaction, you’ll see several options in the register. However, not all fields that are available when inputting transactions appear in the register. To edit fields that aren’t shown, click the Edit button immediately below the transaction to get to the original expense input screen.
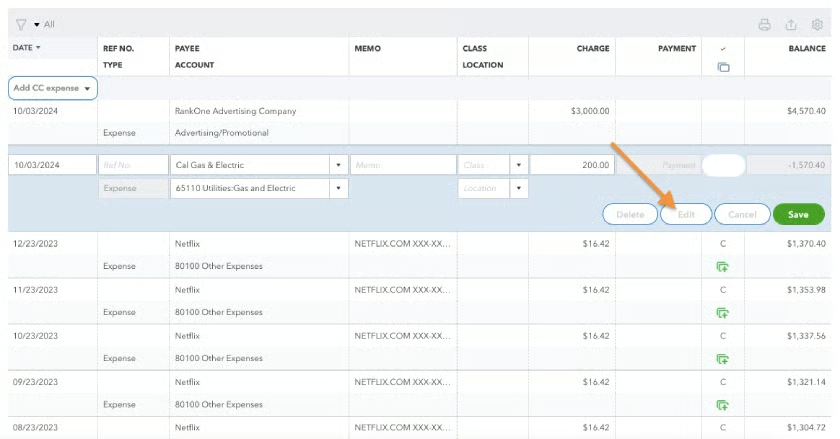
Be sure to save your changes when you’re finished making them directly in the register or editing the original input screen.
When to Enter Credit Card Transactions in QuickBooks Online
Entering credit card charges in QuickBooks Online is useful if you are unable to connect your bank account or want to have the most up-to-date financial information. Credit card transactions won’t transfer to QuickBooks from your account until the charges are final, which could take several days. It’s important to have up-to-date financial information prior to printing financial statements at the end of the month, quarter, or year.
Frequently Asked Questions (FAQs)
Can I automatically import credit card transactions into QuickBooks?
Yes, and you can do so by connecting your credit card account to the software. For guidance, head to our tutorial on how to import bank transactions into QuickBooks, which also covers the steps for connecting credit card and bank accounts.
Can I reconcile my credit card accounts after manually importing my transactions into QuickBooks?
Yes, you can. Once the transactions are recorded, they will appear in the register, allowing you to reconcile the account.
Wrap Up
You have just learned how to enter credit card transactions in QuickBooks Online. Our next guide is how to manage downloaded credit card transactions. There, you’ll learn how to match imported credit card charges to existing QuickBooks transactions or to create a new transaction when there are none.